# How to Upload a Document for e-Signature
### Upload Document with Quick Send
{% hint style="info" %}
You can upload up to 50 files. Each file can be up to 50 MB, and the total upload size per send is limited to 50 MB.
{% endhint %}
1. Open the **Dashboard**.
2. Click the button.
3. Upload your file(s) in the modal window.
4. Check the uploaded file(s) list and click the button.
5. Enter the recipient's email.\
— You can also **Add approver or send a copy**.
6. Click the button.
7. In the top-right corner, click the button.
{% hint style="info" %}
**Supported extensions:**
```
.pdf, .doc, .docx, .xls, .xlsx, .xlsm, .xlsb, .xml, .dbf, .txt, .rtf, .csv, .xps, .eml, .msg, .emlx, .rpmsg, .crt, .pem, .der, .cer, .ppt, .pptx, .png, .jpg, .jpeg, .tiff, .tif, .zip, .7z, .rar, .asice
```
{% endhint %}
### Quick send modal overview
After uploading file(s), the **Quick send** modal window will open:
{% hint style="warning" %}
Please do not use restricted symbols in the file name: ^, , ", /, :, ?, <, >, |
{% endhint %}
* **Subject** — You can edit the title of your envelope. This is what recipients will see in their inbox and email notifications.
* **Message** — You can enter a brief note or instructions for your recipients.
* **Signature format** — You can choose which signatyre format tou want to use
* **Signers** — Users assigned to sign the envelope.
* **Approvers** — Users assigned to review and approve the envelope.
* **Send a copy** — Additional recipients who will only receive a copy of the envelope for their records.
* **I want to sign or fill an envelope** — Enable it to add and fill dynamic fields as sender.
* **Action buttons:**
* **Send** — Advances to the next stage to finalize the envelope.
* **Back** — Returns to the **Upload Documents** modal window.
* **Close** — Exits the **Quick send** process.
{% hint style="info" %}
In **Signers**, **Approvers** or **Send a copy** fields, separate emails with **Enter** or **Space**.
{% endhint %}
#### Recent recipient history
When you enter recipient addresses in **Recepients**, **Approvers**, or **Send a copy**, DocStudio saves recent addresses in local storage.
Rules for saved history:
* Store the last 5 unique addresses
* Keep mailbox and email addresses in one shared list
* Move an existing address to the top when you use it again
* Remove the oldest entry when the list exceeds 5 saved addresses
* Show no more than 6 items in total, including **My mailbox**
Email addresses use the **Mail** icon in a circle.
### Fill fields as Sender
If you enabled **I want to sign or fill an envelope**, as sender, you can add dynamic fields and fill them.
Sender can fill:
{% columns %}
{% column width="25%" %}
* **Text**
* **Number**
* **Currency**
* **Date**
* **Choice**
* **Checkbox**
* **Dropdown**
{% endcolumn %}
{% column width="25%" %}
* **Dictionary**
* **Lookup**
* **Duplicate**
* **Formula**
* **QR/barcode**
* **Signature**
* **Initials**
{% endcolumn %}
{% column width="49.999999999999986%" %}
{% endcolumn %}
{% endcolumns %}
{% columns %}
{% column %}
If there are other recipients, you can choose who fills each field.
{% endcolumn %}
{% column %}
If sender is the only role, all fields are assigned to **Sender** by default.

{% endcolumn %}
{% endcolumns %}
Use advanced settings to fine-tune a field.
{% columns %}
{% column width="41.66666666666667%" %}
**Examples**:
* min/max for Number
* date + time for Date
* QR/barcode size
* field name
{% endcolumn %}
{% column width="58.33333333333333%" %}

{% endcolumn %}
{% endcolumns %}
You can enter data in three ways:
1. Fill data inside field properties.
2. Click a Signature field and draw a signature.
3. Double-click the field.
Double-click works for:
* Text, Number, Currency (edit mode)
* Date and QR/barcode (modal window)
* Choice and Checkbox (toggles the value)
### Import embedded PDF fields
If an uploaded PDF has embedded fields, you can convert them to DocStudio dynamic fields.
For each document with embedded fields, you will see an action modal.
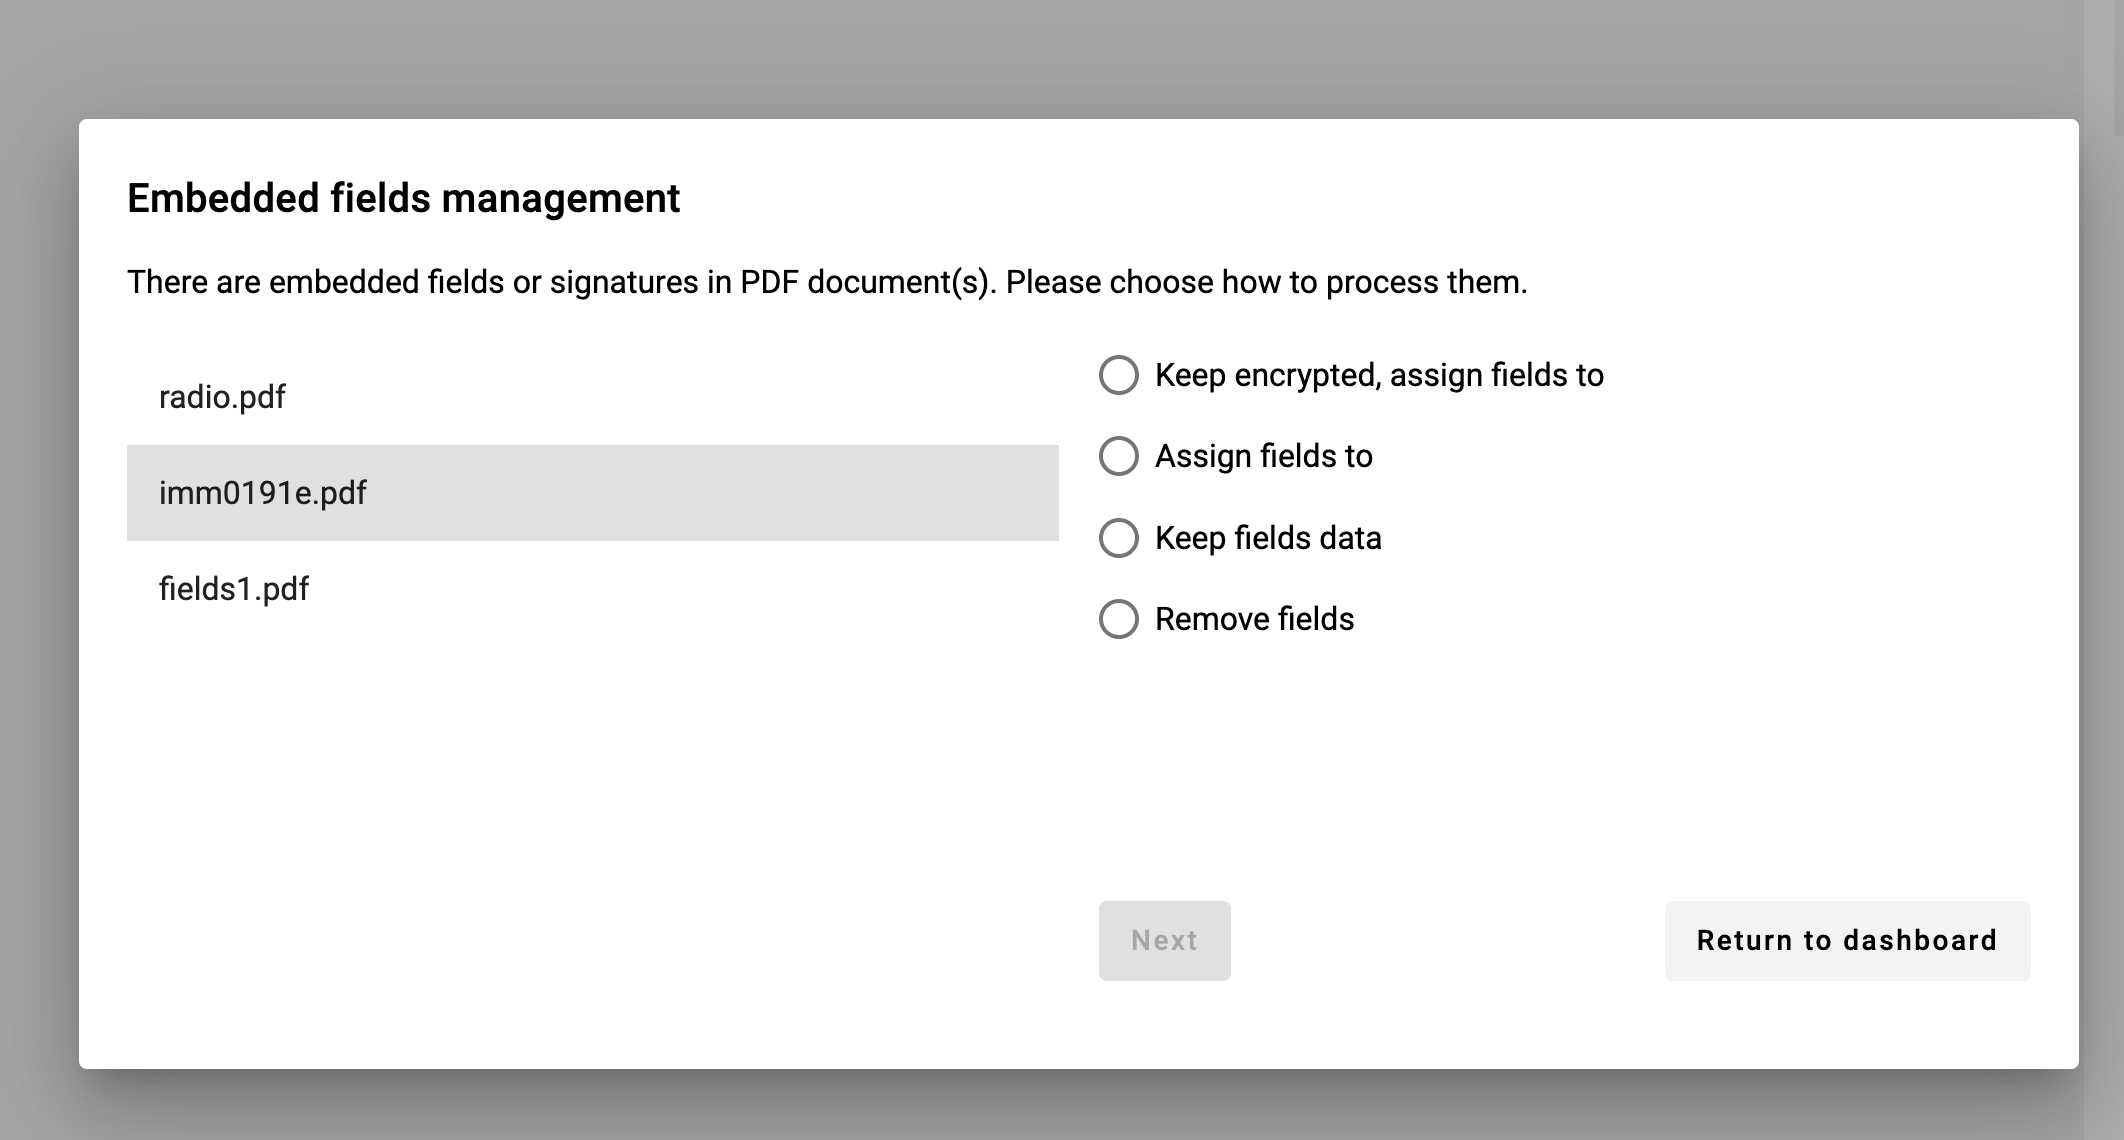
Available actions depend on the embedded field types:
1. **Keep encrypted, assign fields to**. Keeps encryption.
2. **Assign fields to**. Converts embedded fields to DocStudio fields (if possible).
3. **Keep editable fields data**. Keeps editable fields as read-only. Removes signatures and/or encryption. Existing fields are not converted. You can add new fields.
4. **Remove editable fields**. Removes embedded signatures, encryption, and editable fields. You can add new fields.
If the document has more signatures than recipients, **Assign fields to** is not available.
You can assign imported fields to **Recipients**. You can also assign them to **Sender** if you enabled **I want to sign or fill an envelope**.
Conversion map:
{% columns %}
{% column width="41.66666666666667%" %}
* Text → Text field
* Date → Text field
* Checkbox → Checkbox field
* Radio button → Choice field
{% endcolumn %}
{% column width="58.33333333333333%" %}
* Dropdown menu → Menu field
* Listbox → Menu field
* Picture → not supported (field is ignored)
* Barcode → not supported (field is ignored)
{% endcolumn %}
{% endcolumns %}
All imported fields will keep their original **required** or **optional** fields from the PDF.
If you upload several PDFs with fields, you can choose specific actions for each one. Switch between documents on the left side of the window.

---
# Agent Instructions: Querying This Documentation
If you need additional information that is not directly available in this page, you can query the documentation dynamically by asking a question.
Perform an HTTP GET request on the current page URL with the `ask` query parameter:
```
GET https://support.docstudio.com/user/dashboard/how-to-upload-a-document-for-e-signature.md?ask=
```
The question should be specific, self-contained, and written in natural language.
The response will contain a direct answer to the question and relevant excerpts and sources from the documentation.
Use this mechanism when the answer is not explicitly present in the current page, you need clarification or additional context, or you want to retrieve related documentation sections.