# Getting Started
### User Profile
Before you start setting up templates and sending envelopes, [Sign in to DocStudio](#user-profile) and take a minute to review your [Personal Setting Page](/user/user-profile/personal-settings-page-overview.md).
* Make sure your first name and last name are correct
* Addopt a [signature](/user/user-profile/how-to-add-or-edit-an-e-ink-signature.md)
Optional:
* Add [initials](/user/user-profile/how-to-add-or-edit-initials.md)
* [Upload a user icon](/user/user-profile/how-to-upload-a-user-icon.md)
### Send Your First Envelope
#### Dashboard Quick Send
If you only need to send files for signing and do not want to go through the full envelope creation process, you can simply use **Quick Send** from the **Dashboard** to upload and send files.
1. Open the **Dashboard**.
2. Click the button.
3. Upload your file(s) in the modal window.
4. Check the uploaded file(s) list and click the button.
5. Enter the recipient's email.\
— You can also **Add approver or send a copy**.
6. Click the button.
7. In the top-right corner, click the button.
**Learn more:**
* [Dashboard Page Overview](/user/dashboard/dashboard-page-overview.md)
* [How to Upload a Document for e-Signature](/user/dashboard/how-to-upload-a-document-for-e-signature.md).
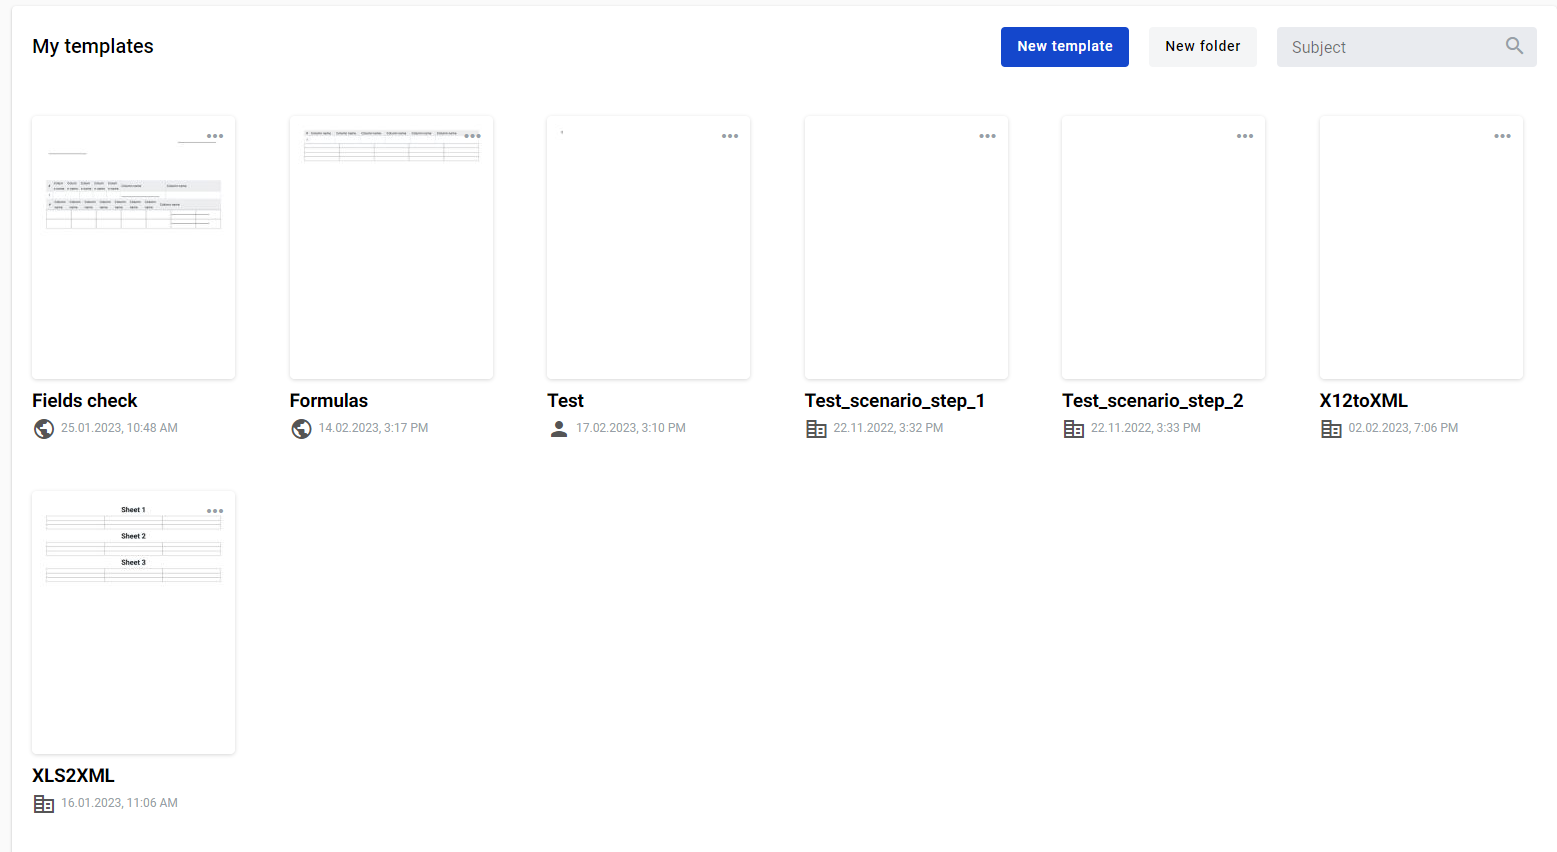
#### Create from a template
For more advanced or reusable workflows, you can create a new template or use an existing one. Templates allow you to configure the document structure, add fields, define recipients, and prepare everything in advance before sending.
1. Open a template card on the dashboard, or a template in the templates list.
2. Click the template card to start an envelope draft.
#### Create by cloning an envelope
1. Open an existing envelope.
2. Click the **Clone** icon.
{% hint style="warning" %}
You won’t see the **Clone** icon if:
* your mailbox has no access to the source template
* the envelope was created via **Quicksend**
{% endhint %}
After creation, the envelope opens as a draft.
1. Fill in roles for the envelope flow.
2. Use **I am assignee/approver/signer** to assign yourself to a role.
3. After you fill all required fields, send the envelope to the next participant.
Click the button to save the envelope and send it later.
{% hint style="info" %}
**Save draft** option is not available for **Quicksend** envelopes.
{% endhint %}
After the first save, the envelope auto-saves after each change. The indicator next to the shows the save status. Auto-save saves your changes, but it does not send the envelope. Auto-save also works for envelopes in **Waiting for you** status.
**Learn more:**
* [How to Create and Send an Envelope](https://app.gitbook.com/o/5SQxQoWgJM8HGKMYA3IO/s/oqUiFHjwtCCGSaEDqbXb/~/edit/~/changes/93/user/envelopes/how-to-create-and-send-an-envelope)
### Sign an Envelope
**Learn more**:
* [How to Complete an Incoming Envelope (Existing DocStudio User)](/user/envelope-invitations-and-completion/how-to-complete-an-incoming-envelope-existing-docstudio-user.md)
* [How to Complete an Incoming Envelope (First-Time Recipient)](/user/envelope-invitations-and-completion/how-to-complete-an-incoming-envelope-first-time-recipient.md)
* [How to Sign an Envelope (E-Ink Signature)](/user/sign-and-download-envelopes/how-to-sign-an-envelope-e-ink-signature.md)
* [How to Sign an Envelope (Qualified Electronic Signature)](/user/sign-and-download-envelopes/how-to-sign-an-envelope-qualified-electronic-signature.md)
* [How to Sign Several Envelopes at Once](/user/sign-and-download-envelopes/how-to-sign-several-envelopes-at-once.md)
### Track Envelope Status
#### Check **Dashboard**
{% columns %}
{% column %}
Open **Dashboard** and look in **Waiting for you** section.
Use this section to quickly find envelopes that need your action.
{% endcolumn %}
{% column %}
{% endcolumn %}
{% endcolumns %}
#### Check **Mailbox**
Open **Mailbox** to review the full envelope list. Use the envelope list to monitor current, completed, cancelled, or expired envelopes.
#### Filter by status
{% columns %}
{% column %}
Use default status filters to find envelopes faster:
* **Waiting for you**
* **On approval**
* **Pending**
* **Completed**
* **Cancelled**
* **Expired**
Use these filters to understand the current stage of the envelope and find documents that still require action.
{% endcolumn %}
{% column %}
{% endcolumn %}
{% endcolumns %}
#### If you cannot find the envelope
* Make sure you are in the correct mailbox.
* Switch mailboxes and check again.
* If needed, combine filters and search to narrow the result.
**Learn more:**
* [How to Find Envelopes That Require Action](/user/envelopes/how-to-find-envelopes-that-require-action.md)
* [How to Filter Envelopes](/user/envelopes/how-to-filter-envelopes.md)
* [How to Customize the Envelope List](/user/envelopes/how-to-customize-the-envelope-list.md)
* [Envelope Flow Statuses](/user/envelope-invitations-and-completion/envelope-flow-statuses.md)
### Download Completed Envelopes
{% hint style="info" %}
You can download signed documents after all participants with the **Signer** role complete their steps.
{% endhint %}
#### Download from the envelope page
1. Make sure the envelope is completed.
2. Open the envelope.
3. Click the **Download**  icon in the envelope header to download the full envelope archive
**Optional:**
* Click the **Download**  icon next to a document name to download only that document archive.
{% columns %}
{% column %}
Full envelope archive:

{% endcolumn %}
{% column %}
Single document archive:

{% endcolumn %}
{% endcolumns %}
The archive downloads right after you Click the download icon .
#### Download multiple envelopes
1. Open your mailbox and select the envelopes you want to download.
2. Click the **More option**s  icon.
3. From a dropdown menu click the **Download envelopes**  icon.
4. Click **Full archive**.
### Related topics
* [Template Builder](/user/template-builder.md) — create and manage templates
* [Template Links & Public Envelope Creation](/user/template-links-and-public-envelope-creation.md) — share templates through public links
* [Envelope Approvals & Delegation](/user/envelope-approvals-and-delegation.md) — send for approval and delegate actions
* [Envelope Comments](/user/envelope-comments.md) — discuss envelope content inside the workflow
* [Scenarios](/user/scenarios.md) — automate multi-step document processes
* [Dictionaries](/user/dictionaries.md) — manage reusable reference data
* [Integrations & API Access](/admin-panel/integrations-and-api-access.md) — connect external systems and use API tools
---
# Agent Instructions: Querying This Documentation
If you need additional information that is not directly available in this page, you can query the documentation dynamically by asking a question.
Perform an HTTP GET request on the current page URL with the `ask` query parameter:
```
GET https://support.docstudio.com/user/getting-started.md?ask=
```
The question should be specific, self-contained, and written in natural language.
The response will contain a direct answer to the question and relevant excerpts and sources from the documentation.
Use this mechanism when the answer is not explicitly present in the current page, you need clarification or additional context, or you want to retrieve related documentation sections.