Table field
Use Table field to add a dynamic table that participants fill during envelope processing.
You can place this field in:
Add a table field
Open the template in edit mode.
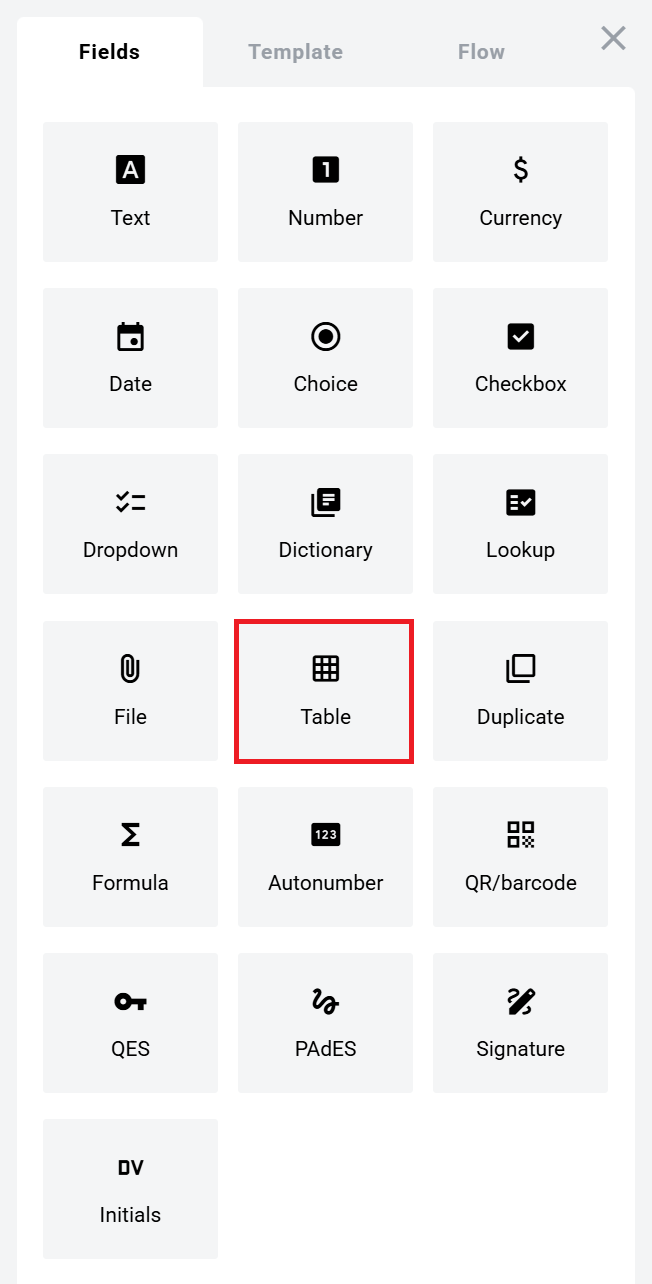
Find Table field and add it to the document.
Click to view the screenshot...
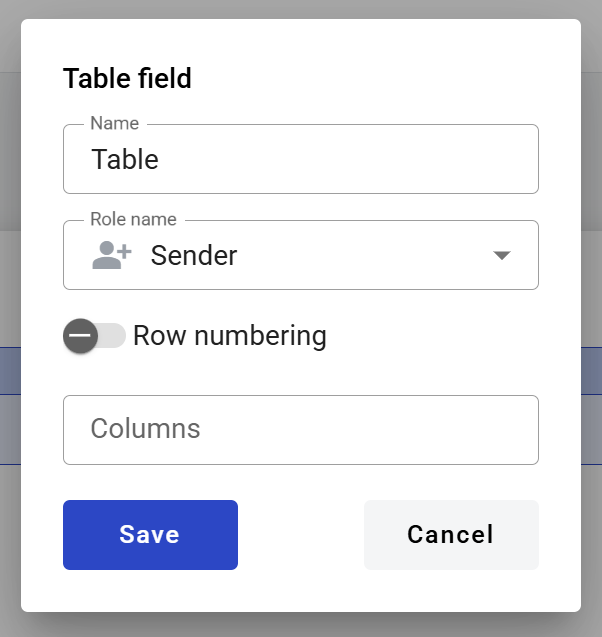
Configure the field and click Save.
Click to view the screenshot...
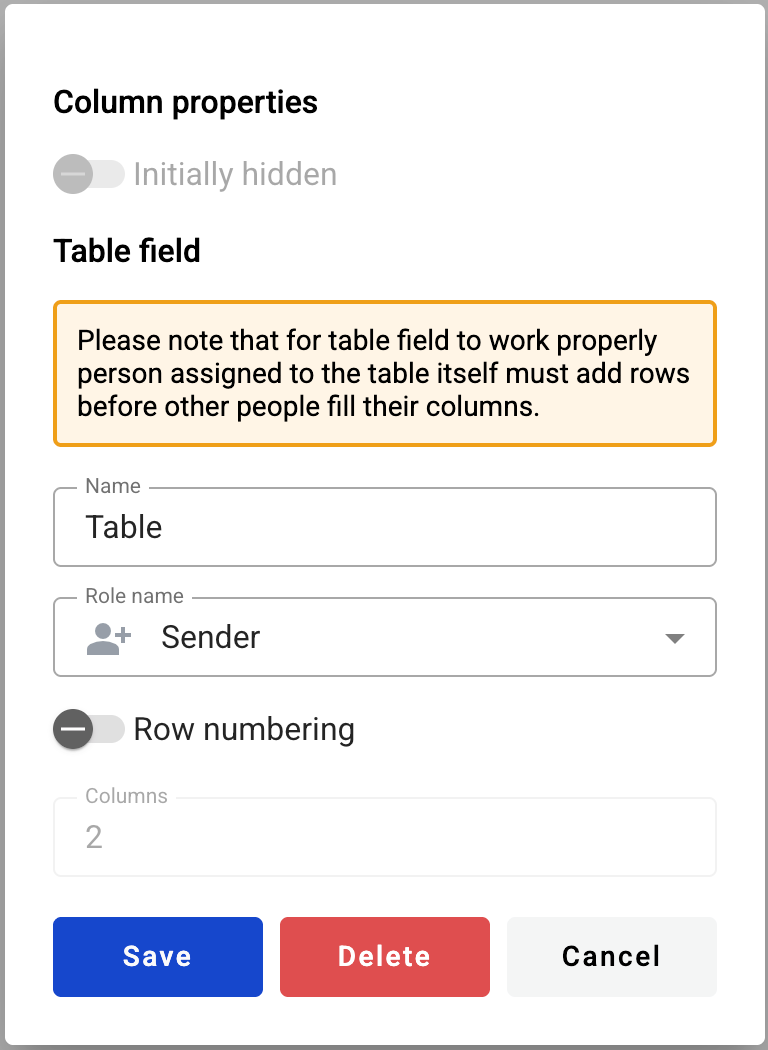
Click the table header in the document to reopen properties and update them.
Name — table name shown in the document
Role name — role that owns the table
Row numbering — shows or hides the numbering column
Columns — number of usable table columns
You can edit table columns in the column header menu:
You can place other dynamic fields inside table cells.
You can’t insert a dynamic table inside another dynamic table.
up to 120 columns per table
minimum column width: 30 px
Hide columns by default
To hide a column in the initial state:
Enable initially hidden in column properties.
You can hide a column only if it contains optional dynamic fields.
You can’t hide columns with:
In the envelope view, users can show hidden columns from the menu on the right end of the table.
If fields in a hidden column stay empty during processing, the column is excluded from the final document.
Roles and permissions
The table owner can add rows and complete mandatory fields.
Other participants can fill only the fields assigned to their roles inside the table.
Edit or delete a table field
Click the table header in the document.
Update settings in the properties panel, or delete the table there.
Click to view the screenshot...